

Showing posts with label Beads. Show all posts
Showing posts with label Beads. Show all posts
Saturday, December 8, 2018
Exquisite Amber
I made a large, rare amber specimen from this amber-colored teardrop that I found at the kickoff.

Using a 1:12 scale, this sample would be approximately 30" long. Exquisite indeed! I tried researching world's largest amber sample, and found this history of the Amber Room instead. The Amber Room was built in 18th century Europe, and once contained several tons of amber. I won't reveal the rest, but it's well worth the read.

Monday, December 3, 2018
Faux Skull
My museum was in desperate need of a skull. But alas, the skulls from the kickoff were not the right scale.


So I turned to Etsy and found this mammal skull soap. It was just the right size to repurpose.

For the pedestal, I used one of the small metal items from the kickoff that I couldn't quite identify. I removed the rust by soaking it in Coke, and discovered a "Timken" label underneath. (I looked up "Timken", and decided that the part looked the most like a coupling.)


I stacked wooden beads on top, and mounted the skull with miniature wax. Results are below. I like how it looks with the meteorite.


Wednesday, November 28, 2018
More Specimen
After the first blocking, it was urgently clear that I needed more butterflies and dung beetles. Devon got to work on this right away. (Thank you, Devon!)


I affixed the frames to the wall with temporary miniature wax, and used more blocks for the pedestals. The dung balls look surprisingly regal.


I affixed the frames to the wall with temporary miniature wax, and used more blocks for the pedestals. The dung balls look surprisingly regal.

Crustaceans next!
Wednesday, November 21, 2018
Mini Fountain
I decided that my mini museum needed an indoor fountain.
And as luck would have it, the ceramic blue soy sauce dish that I found at the kickoff was the perfect scale, color and shape for a fountain base. I started with this and some of the larger beads from the wooden necklace.

I painted the beads gold, and stacked them into a fountain structure.


For the fountain streams, I took some of Bob's fishing wire and threaded it through the beads. (Thank you, Bob!)


And for the pool, I bought some clear acrylic artificial water from Amazon and poured it into the bottom.

The acrylic hardened overnight, and came out looking very much like water. I've positioned the fountain here in front of my Marx Skyscraper.

Here is a closer view.

Happy Thanksgiving!
Monday, November 12, 2018
Mini Dung Beetle
One of the more interesting items that I chose from the kickoff was the Monkey Brand Black Tooth Powder. I used the box to make a poster, but I thought it would be fun to use the actual powder as well.
 And in a moment of clarity, I decided to make a miniature dung beetle.
I used one of the round wooden beads as the foundation for the dung. I had several sizes to choose from, but I ultimately went with medium. (The small bead was not interesting enough, and the scale of the large bead was too grotesque.)


I used one of the round wooden beads as the foundation for the dung. I had several sizes to choose from, but I ultimately went with medium. (The small bead was not interesting enough, and the scale of the large bead was too grotesque.)

I covered the bead with brown-colored clay, and rolled the wet clay in the tooth powder. Incidentally, the tooth powder smells like a combination of tea, moss, and pencil shavings, although I don't think it contains any of these ingredients.

Then I shook off the excess powder and mounted the dung on another bead that I had already painted gold. I am quite pleased with the result.

Tuesday, October 23, 2018
Mini Spinning Tops
This one was almost too easy.
Some of the beads were shaped very much like old-fashioned spinning tops. Here is an example of a 19th century top from the Victoria & Albert Museum of Childhood:


And here are the beads from the necklace. I left one of the beads its original pink, and painted the other one yellow for contrast. We made a special trip to Home Depot tonight get the perfect sized screws. (Thank you, Bob!)


Sunday, October 21, 2018
Ready Made Objets
Some of the items from kickoff were interesting enough to use in their original or close to original form. My favorite was the corkscrew mouse/pig, but the olive bead was a close second. I found the olive loose in the same box as the wooden necklaces. I glued it to a small wood pedestal and Lego square to make a floor lamp.


I mounted the other pieces on the toy blocks and store shelves.


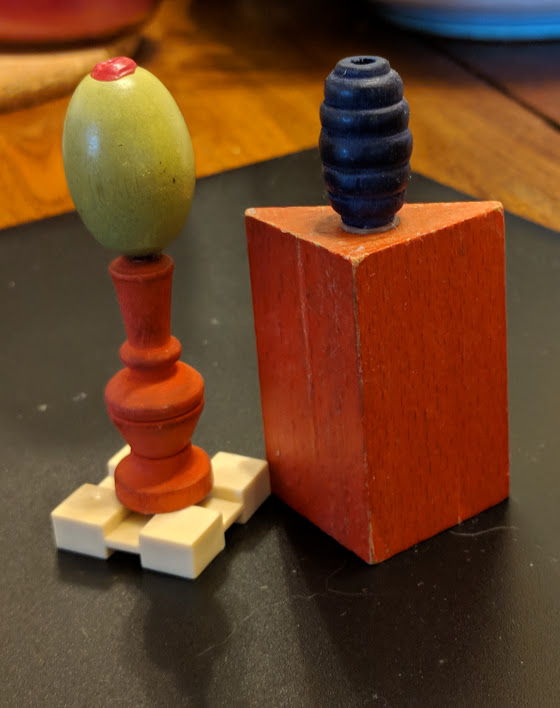
I mounted the other pieces on the toy blocks and store shelves.

It's starting to take shape! I especially like how the ceramic monkey looks with the Monkey Brand Black Tooth Powder poster.


Saturday, October 6, 2018
Mini Vases and Urns
The wooden necklaces were a miniature goldmine. While making the gumballs and yarn, I noticed that some of the larger beads were the right size and shape to make urns, vases, or other objects d'art.


The crackle finish required two steps. First Devon sprayed the beads with a base coat of gold. (Thank you, Devon!)


Results are below. I decided to leave one of the vases gold, although it somewhat resembles a cremation urn. I also mounted a marble on one of the smaller beads to make a crystal ball.

I thought it would be fun to experiment with a cracked finish to create something like this:
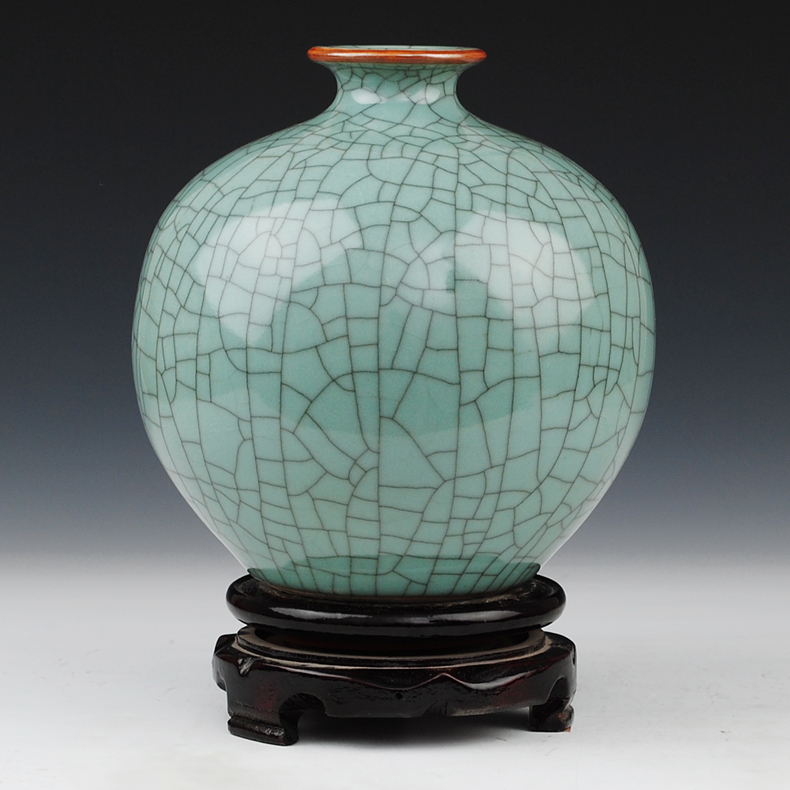
So I bought some crackle spray paint and got to work.


Then she sprayed on the crackle layer and waited for it to dry.


Results are below. I decided to leave one of the vases gold, although it somewhat resembles a cremation urn. I also mounted a marble on one of the smaller beads to make a crystal ball.

Sunday, September 30, 2018
Mini Yarn
I confess that I do not have the patience for embroidery. But I did want to use the embroidery thread that I found at the kickoff.

So I decided to make miniature yarn balls, using more beads from the necklace. I stitched around the beads as shown:


So I decided to make miniature yarn balls, using more beads from the necklace. I stitched around the beads as shown:


Then I cut up the table of contents from one of the books to make labels. The Tommy Tiptop book was perfect for this, as all of the chapters started with "Tommy":


I am still pondering the display, but for now the yarn fits well in the small wooden box from my inventory.

Incidentally, the chapter names made me curious about Tommy Tiptop and his adventures. I read the Great Show last night - quite amusing!
Saturday, September 29, 2018
Mini Gumball Machine
When I was in middle school, I had to take an industrial arts class where we learned to make things from wood, plastic, and metal. I liked the class, but I had trouble using the jigsaw. When we reached the plastics unit, we were allowed to make a project of our choice. I went to the scrap pile and found a small green piece of polyethylene that was already shaped like a seal. I drilled a hole in it and called it a key chain.
And thus is the story of my next Goreyosity Shop installment: a miniature gumball machine!
During the kickoff I was happy to find two wooden necklaces with many different shapes of beads. These will convert nicely to miniature items.

I also found a small clear jar of hooks, which I chose for its size.

I later decided that the jar would work well as a gumball machine.

I cut up the necklaces, and Devon painted some of the smaller beads to make gumballs. (Thank you, Devon!) She also painted one of the toy blocks for the base.


Then I glued one of the wire hooks to the base to make the coin slot. Results are below.

The scale is a bit large for gumballs, so they can also double as superballs.
More beads next!
Subscribe to:
Posts (Atom)